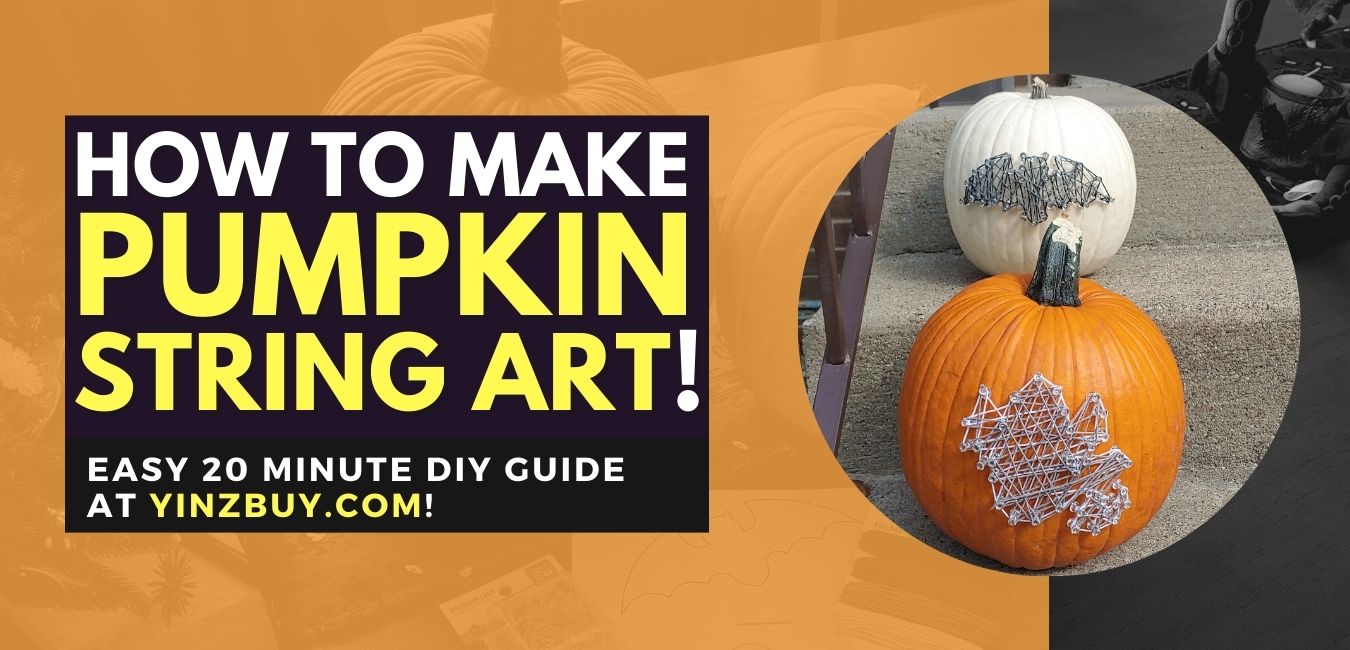
How to Make DIY Pumpkin String Art in Just 20 Minutes!
[vc_row equal_height=”yes”][vc_column][vc_row_inner][vc_column_inner width=”1/6″][vc_facebook type=”button_count”][/vc_column_inner][vc_column_inner width=”1/6″][vc_tweetmeme share_via=”YinzBuy”][/vc_column_inner][vc_column_inner width=”1/6″ css=”.vc_custom_1606731333432{margin-top: -5px !important;}”][vc_pinterest][/vc_column_inner][vc_column_inner width=”1/2″][/vc_column_inner][/vc_row_inner][vc_row_inner][vc_column_inner][vc_column_text]Every year, there’s nothing I love more than carving funny or spooky pumpkins for Halloween. What I don’t love, however, is the mess! Pumpkin guts everywhere. I’m still finding lost seeds from years ago. So, this year I opted for DIY pumpkin string art instead.
Pumpkin string art is a method of creating a design out of string on your pumpkin. It requires no carving, no painting, and creates almost no mess. It’s also incredibly kid friendly and easy to do.
I’ve prepared this step-by-step guide to walk you through how to create DIY pumpkin string art of your very own.[/vc_column_text][vc_column_text]
[/vc_column_text][vc_column_text]
Everything You Need to Create Pumpkin String Art
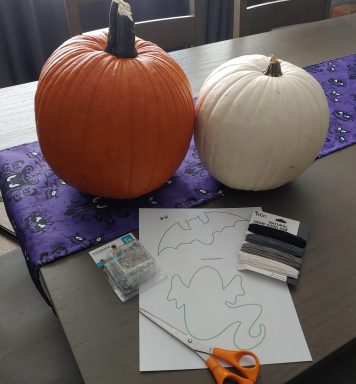
First and foremost, let’s talk about what supplies you’ll need. Here is the list of everything you need to purchase or assemble in order to create your pumpkin string art:
- Pumpkin
- Push pins, small nails, or similar
- String, yarn, or similar
- Scissors
- Printer
 [/vc_column_text][vc_column_text]
Choosing Your Ultimate String Art Pumpkin
For the pumpkin, the best part is that you can use a real or a foam pumpkin for this project. If you want to reuse it year after year, go with the faux version. If you prefer to change designs and DIY it every year, choose a real one.
The size honestly is entirely up to you. There are all sorts of assorted sizes to choose from, so pick what fits your home and desired design best.
Pumpkins also come in a variety of colors. Again, no real difference here. I chose one traditional orange and one white pumpkin this year to add some variety. You could even get silly with a gingham pumpkin, so feel free to be creative. That’s what pumpkin string art is all about![/vc_column_text][vc_column_text]
Like a Voodoo Doll – Pins for Your Pumpkin String Art
When it comes to the pins, you again have a variety of choices that work. I personally use clear push pins for my design. I like them because they go in easily and hold a lot of string. You could use any color, but I think the clear helps to not detract from the design.
The other most common choice is small nails. They are less obvious than a push pin in your design, which is nice (and it gives your pumpkin a little Pinhead vibe). However, you’ll need to carefully hammer in the nails. If you have little ones, this might be more of a headache.[/vc_column_text][vc_column_text]
Wrap That Mummy Up: String Is Essential
When it comes to creating DIY pumpkin string art, it’s pretty obvious that string is an essential component.
Thankfully, you can use all sorts of different string to create the design you like, such as:
- Yarn provides a nice thick strand and is available in a ton of colors. This candy corn yarn blend gives me great Halloween vibes!
- Twine is a little thinner, but easy to wrap and work with. You may even have some laying around from gift wrapping! If not, this Halloween twine is a great choice.
- Jute adds a little bit of texture as well. It’s thicker like yarn, but coarser in texture. Getting a mix of colors allows you to create a unique look.
I personally used hemp cord, which is common in jewelry making. It’s somewhere between a twine and a jute, and available in a ton of fun colors!
 [/vc_column_text][vc_column_text]
Choosing a String Art Pumpkin Pattern
I mentioned earlier that you’ll need a printer, and this is because you’ll need to print out a pattern for your string art pumpkin.
If you’re doing a lot of pumpkins, you can save time with a more advanced pattern making tool, like the Cricut machine. If you want to learn more, check out our guide on what is a Cricut and what does it do? In short, though, it’s a crafter’s best friend!
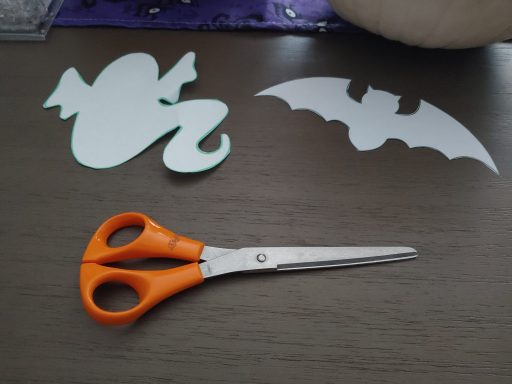
Once you’ve got something handy for printing the pattern, you’ll want to actually choose a pattern. I honestly just roved around a free clipart library to find some cute designs. Here’s some important pointers for choosing a string art pumpkin pattern:
- Look for an outline only, as no fancy interior designs will carry over
- Choose a simple design – very complex and intricate ones won’t look good once finished
- Factor in size and shape of your pumpkin; whether it’s tall or wide will make a difference
After you’ve settled on a pattern, print it out! Unless you’ve got a Cricut doing the work for you, you’ll then want to trim it to shape with those scissors I mentioned earlier. Any pair of scissors that can cut paper will do here!
 [/vc_column_text][vc_column_text]
Step-By-Step: How to Create DIY Pumpkin String Art
You’ve got all your supplies assembled, and you’re ready to get your pumpkin art on! Let’s go through a step-by-step guide now on how to create your DIY pumpkin string art design.
1. Wash and dry your pumpkin
Skip this step if using a foam pumpkin!
2. Place the pattern in the desired spot on the pumpkin
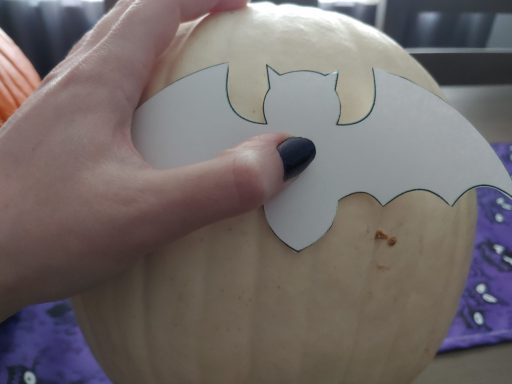
You can either hold it in place with one hand, or use some double sided tape.
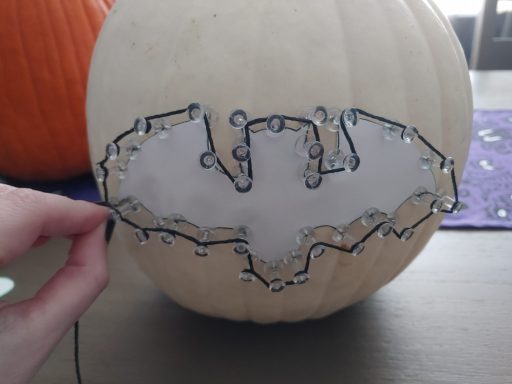
3. Push in the pins or hammer in nails around the outside of the pattern
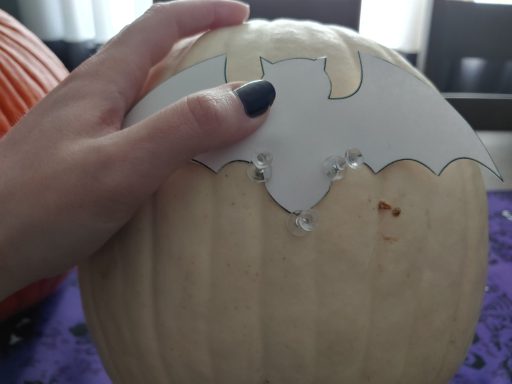
Do not push the pins through the paper, only into the pumpkin itself using the paper as a guide.
4. Make sure a pin is in each corner, turn, or curve of the design
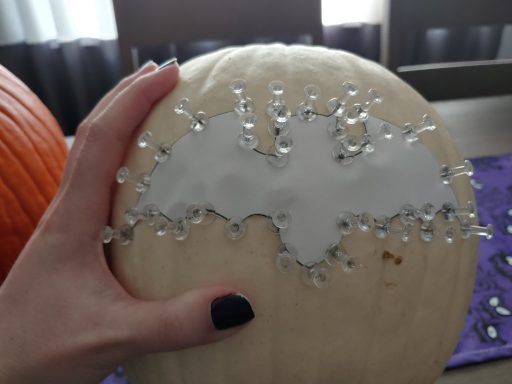
This helps ensure you recreate an accurate outline of your template in string. Long story short, your bat will actually look like a bat without the pattern behind it!
5. Loop and knot your desired border color string on the first pin
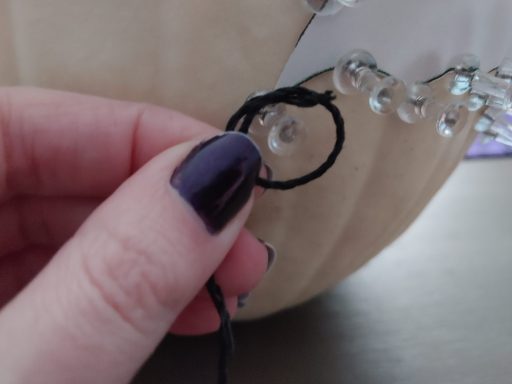
Trim excess string with scissors.
6. Bring the string to the next pin, loop once around it, then continue to the next pin

Just work your way from right to left (or left to right) around your design. Whatever feels most comfortable to you!
7. Repeat until you have created an entire border around the design
Tie it off when you get to the end and have made a full circle.
8. Once you finish the outline, carefully remove the paper
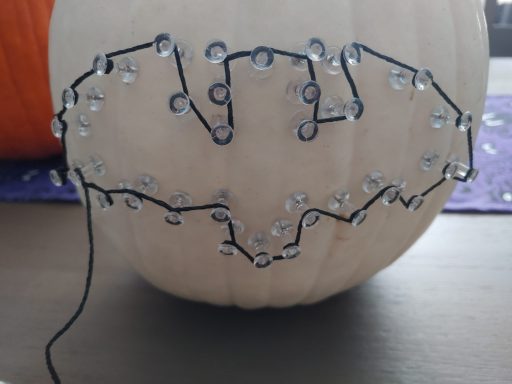
This is why you don’t want to skewer your template paper.
9. Using the same or different color string (your choice), now begin filling in the interior of the design

You could go back and forth one way, then the other. Or, simply randomize your looping movements from pins across from each other. As long as you’re filling in the interior, there’s no “wrong” way to complete pumpkin art. Let your creative design speak to you!
10. Repeat until the pattern is as filled in as you desire
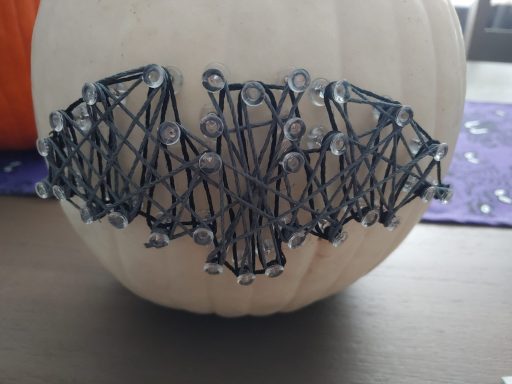
Tip: if things are getting hard to wrap, push the existing string closer to the pumpkin so you can keep stringing.[/vc_column_text][vc_column_text]
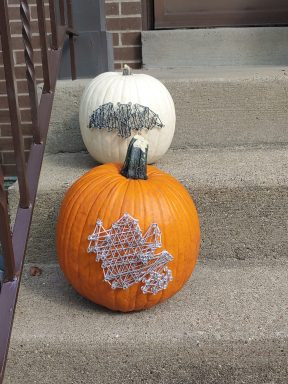
Displaying Your DIY String Art Pumpkin
Wasn’t that easy? It only takes about 20-30 minutes in total to create a unique DIY string art pumpkin.
I placed mine outside on the front steps to show off to the neighborhood. However, they make great indoor decorations as well! Add some to your centerpiece, your mantle, or anywhere you’d like a little Halloween or Fall décor.
The best part about these is that it’s not just limited to Halloween. Change up the designs and colors, and you can make an adorable Thanksgiving centerpiece as well. I’ve even got my eye on a foam tree for some Christmas fun, or a foam egg for Easter. The possibilities are endless!
Looking for more DIY Halloween fun? Check out our guide on how to decorate a Halloween tree for a spooky addition indoors or out.
Pop on a pumpkin lamp post cover for a quick and easy way to dress up your outdoor lights for Halloween.
If you’re going the more traditional carving route, try these pumpkin punchers for a kid-friendly way to cut a jack o’ lantern!
For another unique way to make your pumpkin stand out, check out Realistic Pumpkin Carving. This book will give you easy to learn techniques to make extremely detailed pumpkins![/vc_column_text][vc_column_text]
As noted on our Affiliate Disclaimer page, links to products inside this blog could lead to sales commissions (at no additional cost to you) which allow this site to continue operations.
[/vc_column_text][/vc_column_inner][/vc_row_inner][/vc_column][/vc_row]